AWS Login
No AWS region has been configured. The AWS region is the geographic location of your AWS resources.
If you have used AWS before and already have resources in your account, specify which region they were created in. If you have not created resources in your account before, you can pick the region closest to you: https://docs.aws.amazon.com/global-infrastructure/latest/regions/aws-regions.html.
You are able to change the region in the CLI at any time with the command “aws configure set region NEW_REGION”.
Attempting to open your default browser. If the browser does not open, open the following URL.
If you are unable to open the URL on this device, run this command again with the ‘–remote’ option.
Create S3 Bucket
1 | export S3_BUCKET_NAME=my-openab-configs |
設定 OIDC Provider
先建立 openid-configuration 檔案:
1 | cat > discovery.json <<EOF |
Upload to S3 Bucket
1 | aws s3 cp ./discovery.json s3://$S3_BUCKET_NAME/.well-known/openid-configuration --acl public-read |
Generate service account singing key
1 | export PRIV_KEY="sa-signer.key" |
Update K3s configuration and get jwks keys file
- Store the newly generated service account signing keys on the K3s servers nodes and update the K3s API Server launch flags with below additional kube-api-server flags and start the K3s server
Copy those keys and update /etc/rancher/k3s/config.yaml in your k3s host. The description of those config.
1 | # The below api-audiences flag sets an aud value for tokens that do not request an audience |
1 | cat <<EOF |
Use this output to append to your /etc/rancher/k3s/config.yaml. Restart the K3s service on each server node so the new flags take effect:bash
1 | sudo systemctl restart k3s |
- Upload the JWKS keys.json file to the same S3 bucket where we will publish the public keys that clients can use to Verify the signature of client-based access tokens and OpenID Connect ID tokens
1 | kubectl get --raw /openid/v1/jwks | jq > ./keys.json |
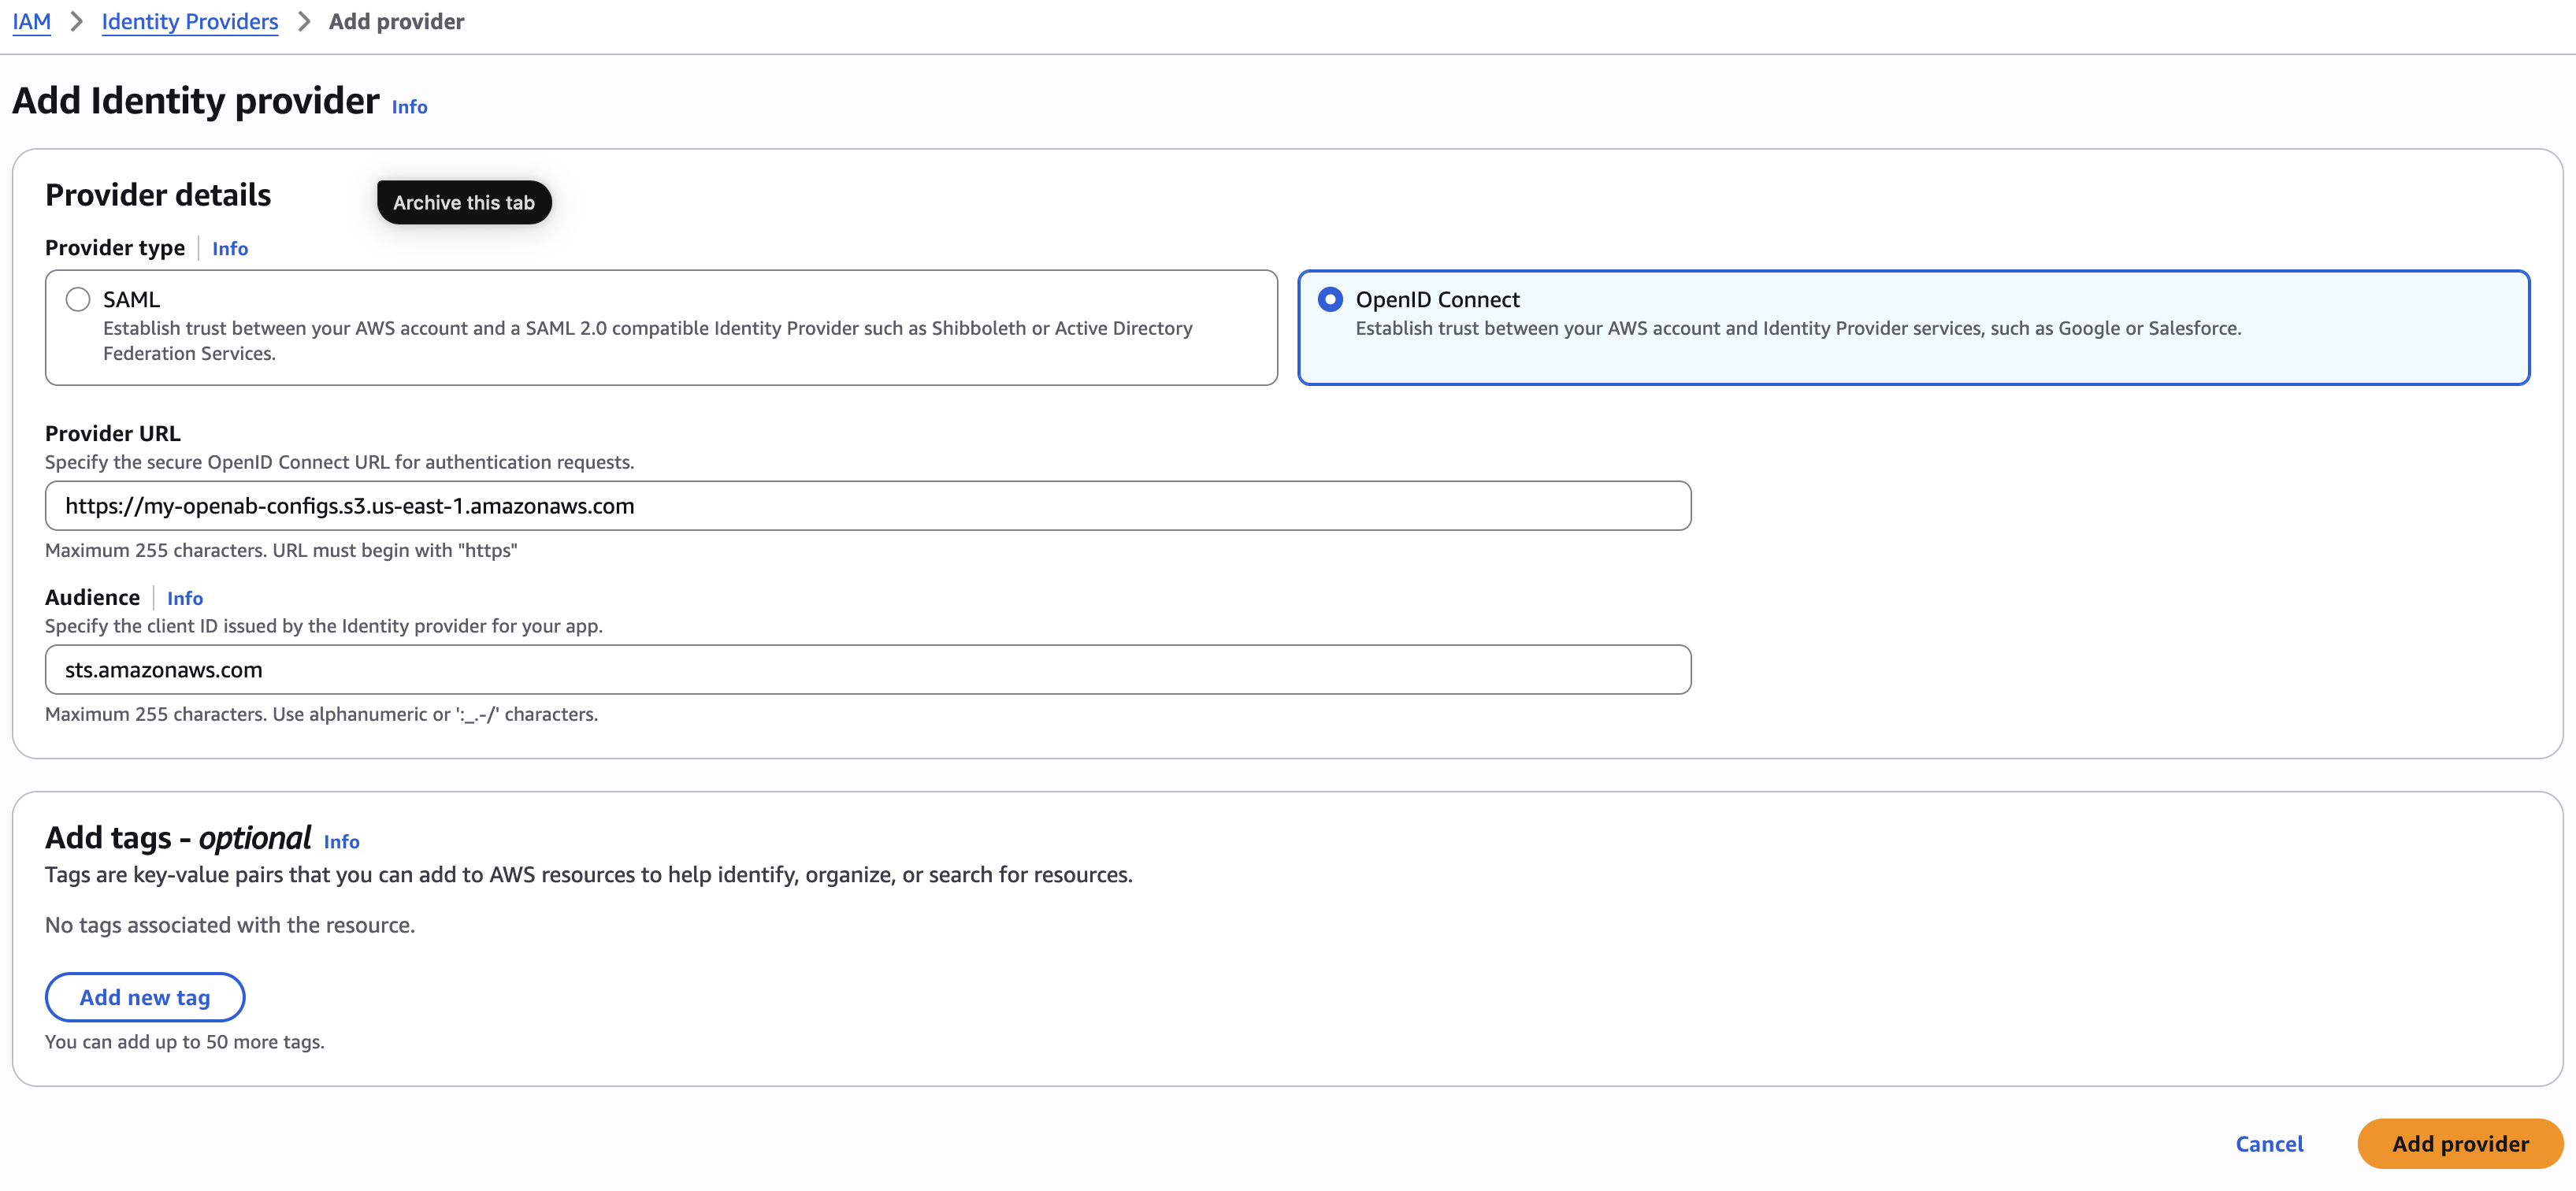
- Create an OIDC provider for your cluster. Set the Provider URL to
https://${S3_BUCKET_NAME}.s3.${AWS_REGION}.amazonaws.comand Audience tosts.amazonaws.com
Go to IAM -> Identity Providers -> Create Provider
Install AWS pod mutating admission controller —
- Deploy Cert Manager as its a pre-requisite for the pod mutating admission controller https://cert-manager.io/docs/installation/
1 | kubectl apply -f https://github.com/cert-manager/cert-manager/releases/download/v1.15.2/cert-manager.yaml |
- Deploy Amazon EKS Pod Identity Webhook
https://github.com/aws/amazon-eks-pod-identity-webhook/tree/master
A mutating admission controller for automatically injecting AWS credentials to the Pods that used the Service Accounts signed using our new OIDC Issuer
clone the git repository and run
1 | git clone https://github.com/aws/amazon-eks-pod-identity-webhook && cd amazon-eks-pod-identity-webhook |
建立 IRSA in AWS
Assuming:
1 | export NAMESPACE=guandu |
你這裡需要建立的是兩個不同東西:
IAM Role + Trust Policy:決定哪個 k3s ServiceAccount 可以透過 OIDC assume 這個 role。
Permissions Policy:就是你貼的 S3 + Secrets Manager 權限,決定 assume 成功後可以做什麼。
AWS CLI 建立 Role 時,trust policy 要透過 –assume-role-policy-document 提供;之後再用 put-role-policy 或 managed policy attach 給 role。
假設你目前的環境是:
先建立 trust policy 檔案:
1 | cat > trust-policy.json <<EOF |
接著建立 IAM Role:
1 | aws iam create-role \ |
或是修改
1 | aws iam update-assume-role-policy \ |
這一步會建立:
1 | IAM Role: |
AWS CLI 官方的 create-role 就是用這種方式建立 role 並同時指定 trust relationship。
接下來建立 permissions policy:
1 | cat > permissions-policy.json <<EOF |
然後最簡單的做法,是直接加成 inline policy:
1 | aws iam put-role-policy \ |
put-role-policy 會把 policy 直接嵌在這個 Role 裡,適合這種「這個 policy 就只屬於這個 IRSA role」的情境。
完成後,你的 AWS IAM 結構會是:
1 | IAM Role |
然後 Kubernetes 這邊:
1 | kubectl create namespace $NAMESPACE |
取得剛建立的 IAM Role ARN:
1 | ROLE_ARN=$(aws iam get-role \ |
應該會得到:
1 | arn:aws:iam::255083652103:role/openab-secrets-reader |
然後把它 annotate 到 ServiceAccount:
1 | kubectl annotate serviceaccount \ |
驗證:
1 | kubectl get sa $SERVICE_ACCOUNT \ |
你應該看到:
1 | apiVersion: v1 |
最後建議也驗證 AWS IAM 端。
看 Role:
1 | aws iam get-role \ |
看 inline policy:
1 | aws iam list-role-policies \ |
應該看到:
1 | { |
再看內容:
1 | aws iam get-role-policy \ |
有一個地方你一定要確認:你的 OIDC_HOSTPATH 必須跟 AWS IAM OIDC Provider 裡實際建立的 URL 完全一致,而且 k3s JWT 的 iss 也要對得上。否則 role 和 policy 都建立成功,最後 STS 還是會報 InvalidIdentityToken 或 AccessDenied。
建立一個 pod 驗證
Create a deployment in guandu namespace and edit the deployment to add the serviceAccountName: guandu
1 | kubectl -n $NAMESPACE create deploy aws-cli --image amazon/aws-cli |
1 | kubectl -n $NAMESPACE rollout restart deployment <deployment-name> |
Now the AWS Credentials should be automatically injected to the awscli deployment pods by the AWS Pod Mutating Admission Controller
kubectl -n $NAMESPACE pods/aws-cli-xxxxxxxx-xxxxx -oyaml
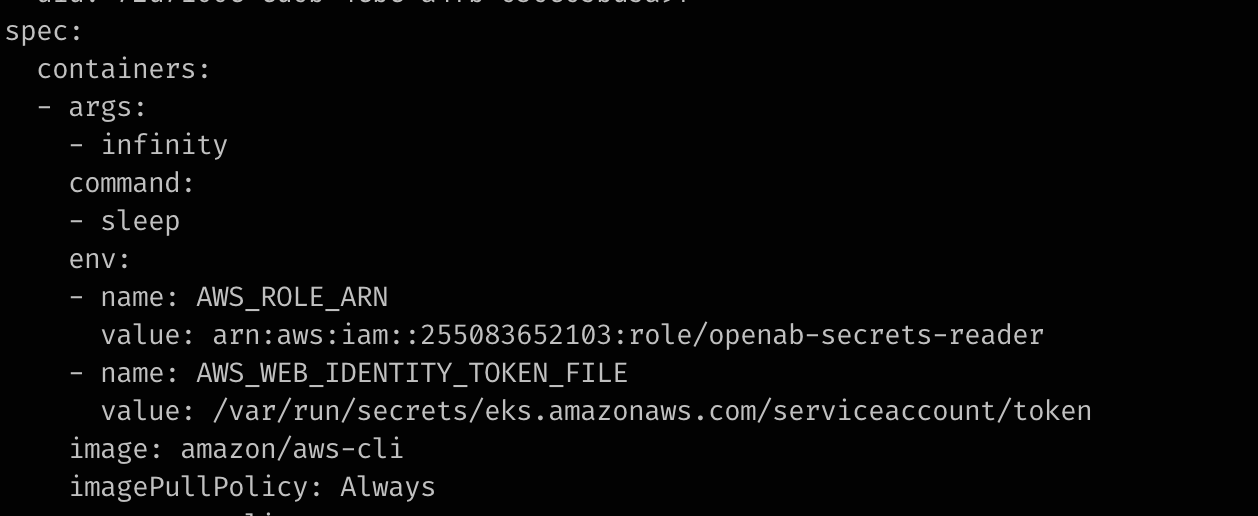
kubectl exec -n guandu -it deployment/aws-cli – bash
aws s3api get-object –bucket my-openab-configs –key agents/config-caocao.toml config-caocao.toml
aws s3 cp s3://my-openab-configs/agents/config-caocao.toml ./config-caocao.toml
Create the ServiceAccount:
1 | kubectl create serviceaccount ${SERVICE_ACCOUNT} \ |
Annotate it with the IAM role:
1 | kubectl annotate serviceaccount ${SERVICE_ACCOUNT} \ |
That command corresponds to:
1 | apiVersion: v1 |
AWS uses exactly this annotation for IRSA.
測試 secret-manager
aws secretsmanager create-secret
–name openab/prod
–secret-string file://aws-sm-secrets.json
{
“ARN”: “arn:aws:secretsmanager:us-east-1:255083652103:secret:openab/prod-PHnaot”,
“Name”: “openab/prod”,
“VersionId”: “caf33b83-53d4-49df-9db8-8af0f5382723”
}
aws secretsmanager get-secret-value
–secret-id openab/prod